Image Optimization with GIMP
Performance optimization is a key component to making or breaking the success of a website. While it can be challenging at times, there are small steps we can take to move in the right direction for improving the FCP speed of a page. One step we can take is to decrease the size of our image files before including them in our website. This article will cover how to prepare your images with a software tool called GIMP.
What is Gimp?
GIMP stands for GNU Image Manipulation Program. It is a free and open source tool for editing images, similar to Adobe Photoshop. While Photoshop provides more tools at your disposal in comparison, GIMP is more accessible to everyone because it is completely free. Not only that, GIMP contains everything needed to decrease the size of your images as well as plenty of valuable tools to use for altering your images to fit your needs. Free, easy to use, and provides a lot of great image editing tools which makes it a great resource for every developer to keep in their back pocket.
Let’s Get Started
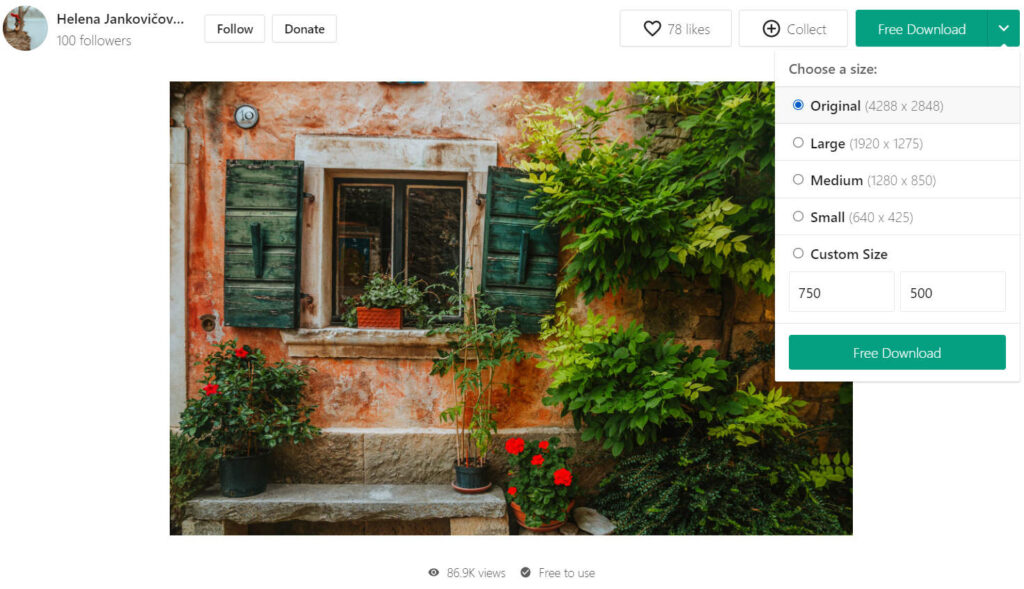
Now that we’ve had a brief introduction to what GIMP is and how we can use it, I’ll go over how to get started. The install process is straightforward, just head over to the GIMP website and follow the download and install instructions for your Operating System. Once the program is properly installed, we can grab an image from Pexels. Select the image size that most suits your needs, I’ll be grabbing the large size for this demonstration.
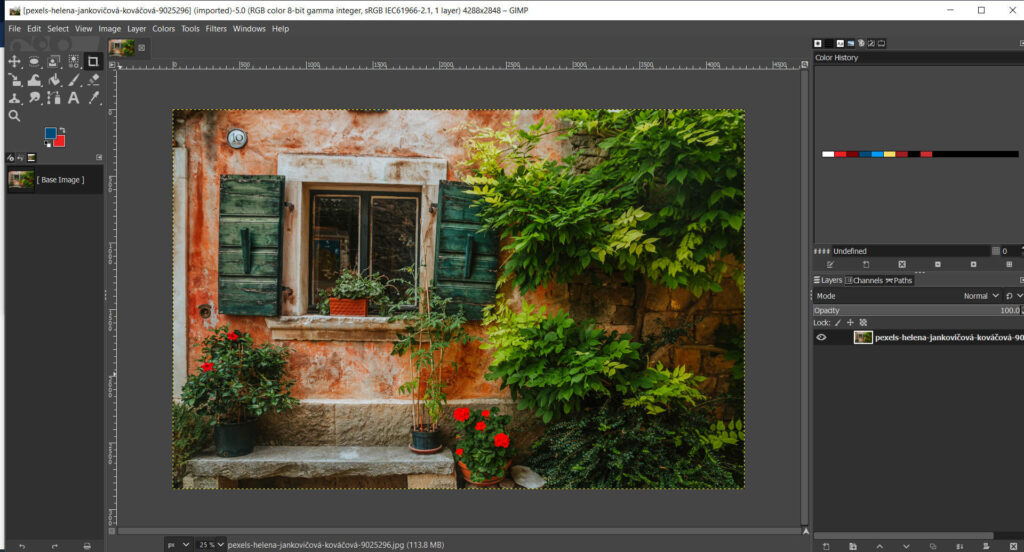
Now that we have the image we want to use, we can download it to our computer. Once it’s downloaded, all you have to do is open your GIMP program and drag and drop the image over the window. Your editor should look something like this:
Everything up to this point has been pretty straightforward, and decreasing the size of your images with GIMP is no different. Go to File -> Export As in the top left corner of the window. In this new popup window, there will be an option to select the file type extension in the bottom left corner. For photographs used in our site, we want to be sure to use images with a .jpg file extension to keep the image size down. JPG is better suited for photos that use a lot of color, whereas PNG is better for images that have a lot of text or not a lot of color. Once we have the correct file extension selected, you’ll want to click Export in the bottom right corner of the window.
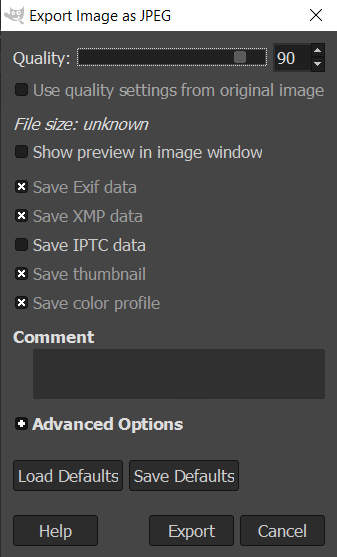
Once we click export, we should have this small window popup on the screen. At the top of the window, we can adjust the quality of our image with a slider. If the current image quality is high, like 90 for example, we can typically adjust it to somewhere around 60-70 for using on our site. This is something you can experiment with, I will typically keep it around 65 and the image quality isn’t compromised. Once that value is adjusted, click export and the process is finished.

You can see that we were able to decrease the size of the image in a matter of seconds using GIMP.